Since WinCC Unified V17, users have been able to set upper and lower limits for tags to ensure the value stays within a defined range. This feature is essential for preventing invalid inputs and protects connected devices from unexpected inputs.
In this guide, I’ll walk you through the steps to set tag limits in WinCC Unified V20 using a simple example.
Steps to Define Tag Input Limits #
-
Create a New Tag
- Open the Tag Table and create a new tag (e.g.,
Data_Integer_Value)
- Open the Tag Table and create a new tag (e.g.,
-
Access Tag Properties
- Hover over
Data_Integer_Value, then right-click → Properties.
- Hover over
-
Define Upper and Lower Boundaries
- Navigate to the Range section.
- Under
Lower2andUpper2, set the minimum and maximum values according to your requirements.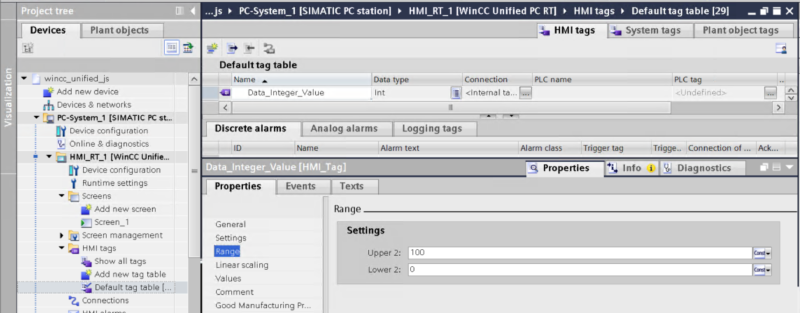
-
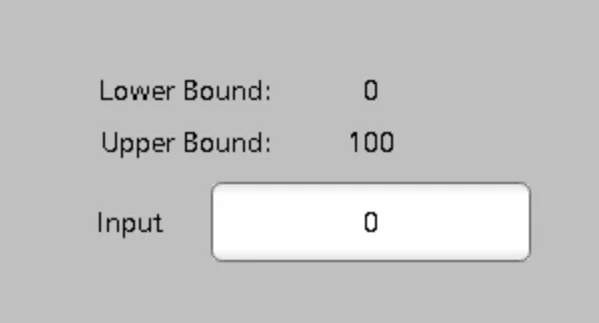
Link Tag to a Screen Element
- Add a new Screen.
- In the new screen, add an IO Field element.
- Link the Process Value of the IO Field to the tag
Data_Integer_Value.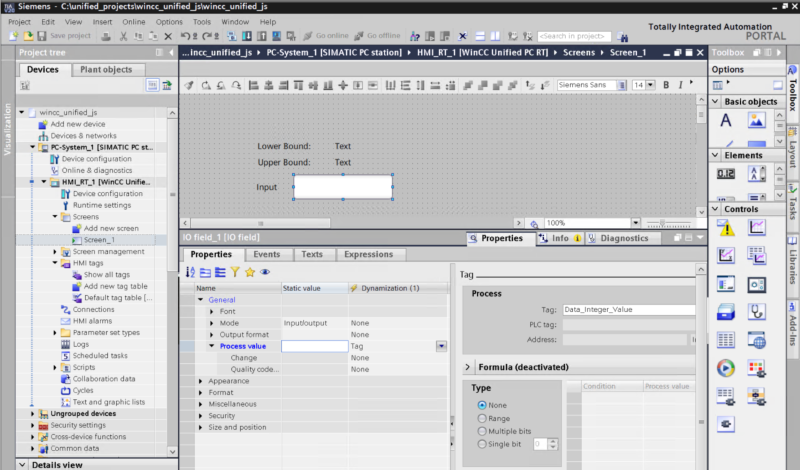
-
Run Simulation Mode to verify the range settings
- Start Simulation Mode.
- Try entering values beyond the defined limits to see how the system handles them.