WinCC Unified - Clamping tag value
In my previous post, I shared the importance of setting tag limits to prevent bad data from causing issues in SCADA systems. Now, let's talk about another essential safeguard — clamping values.
Clamping vs. Tag Limits
While both clamping and tag limits help control data quality, they serve different purposes:
-
Tag limits: Used to filter out and reject values that exceed a predefined range, preventing them from being processed at all.
-
Clamping: Adjusts out-of-range values to stay within acceptable limits, ensuring the system continues to function without interruption.
Steps to implement Clamping in WinCC Unified
-
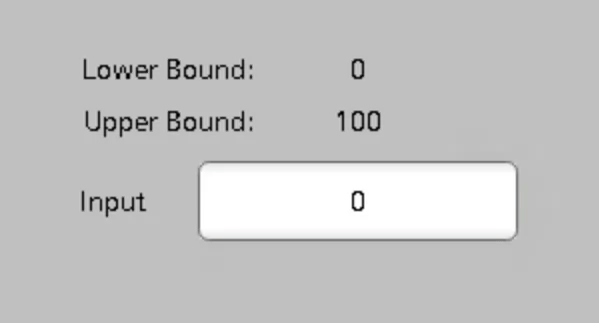
Create Data, Lower and Upper Bound Tags
- Open the Tag Table and create a data tag (e.g.,
Data_Integer_Value), a lower bound tag and an upper bound tag - Set the lower and upper bound tags with their respective
Start value(e.g. upper bound = 100, lower bound = 0)
- Open the Tag Table and create a data tag (e.g.,
-
Link Data Tag to a Screen Element
- Add a new Screen.
- In the new screen, add an IO Field element.
- Link the Process Value of the IO Field to the tag
Data_Integer_Value.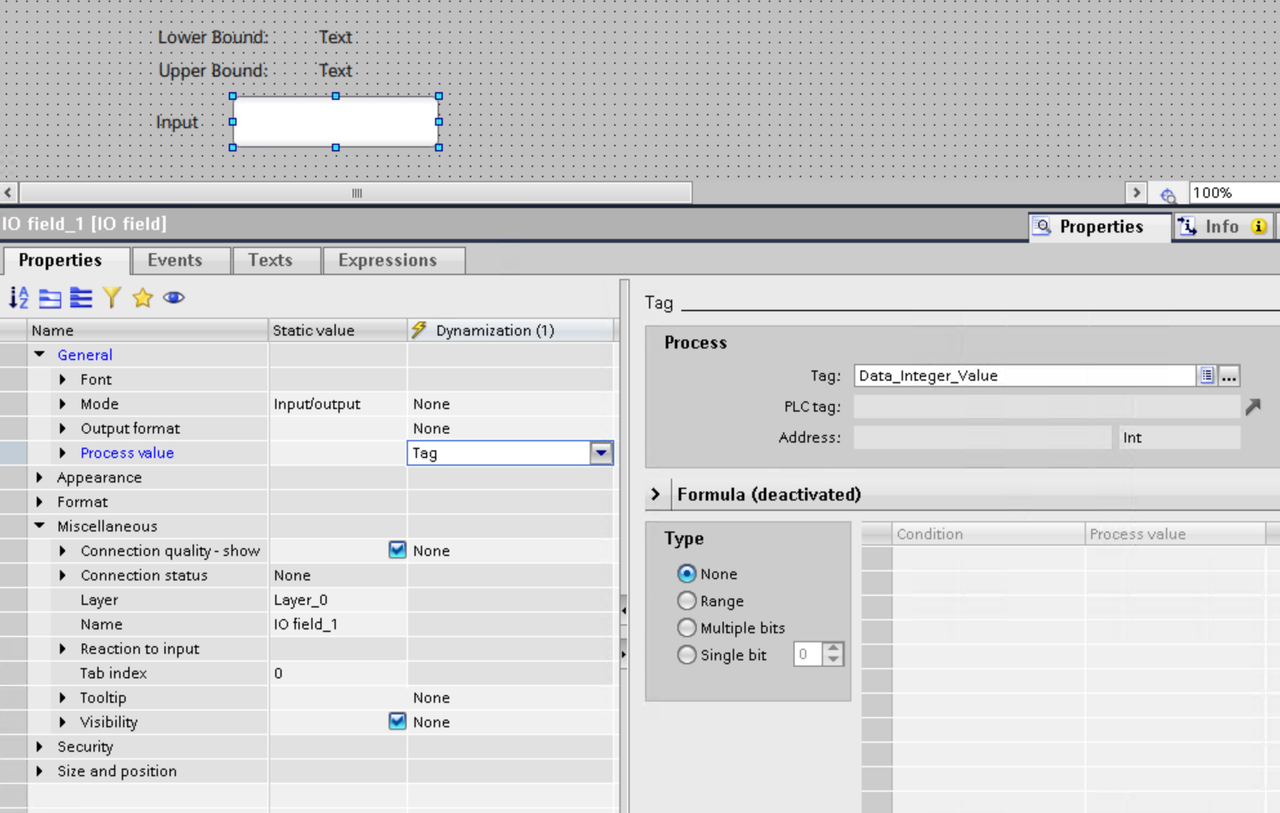
-
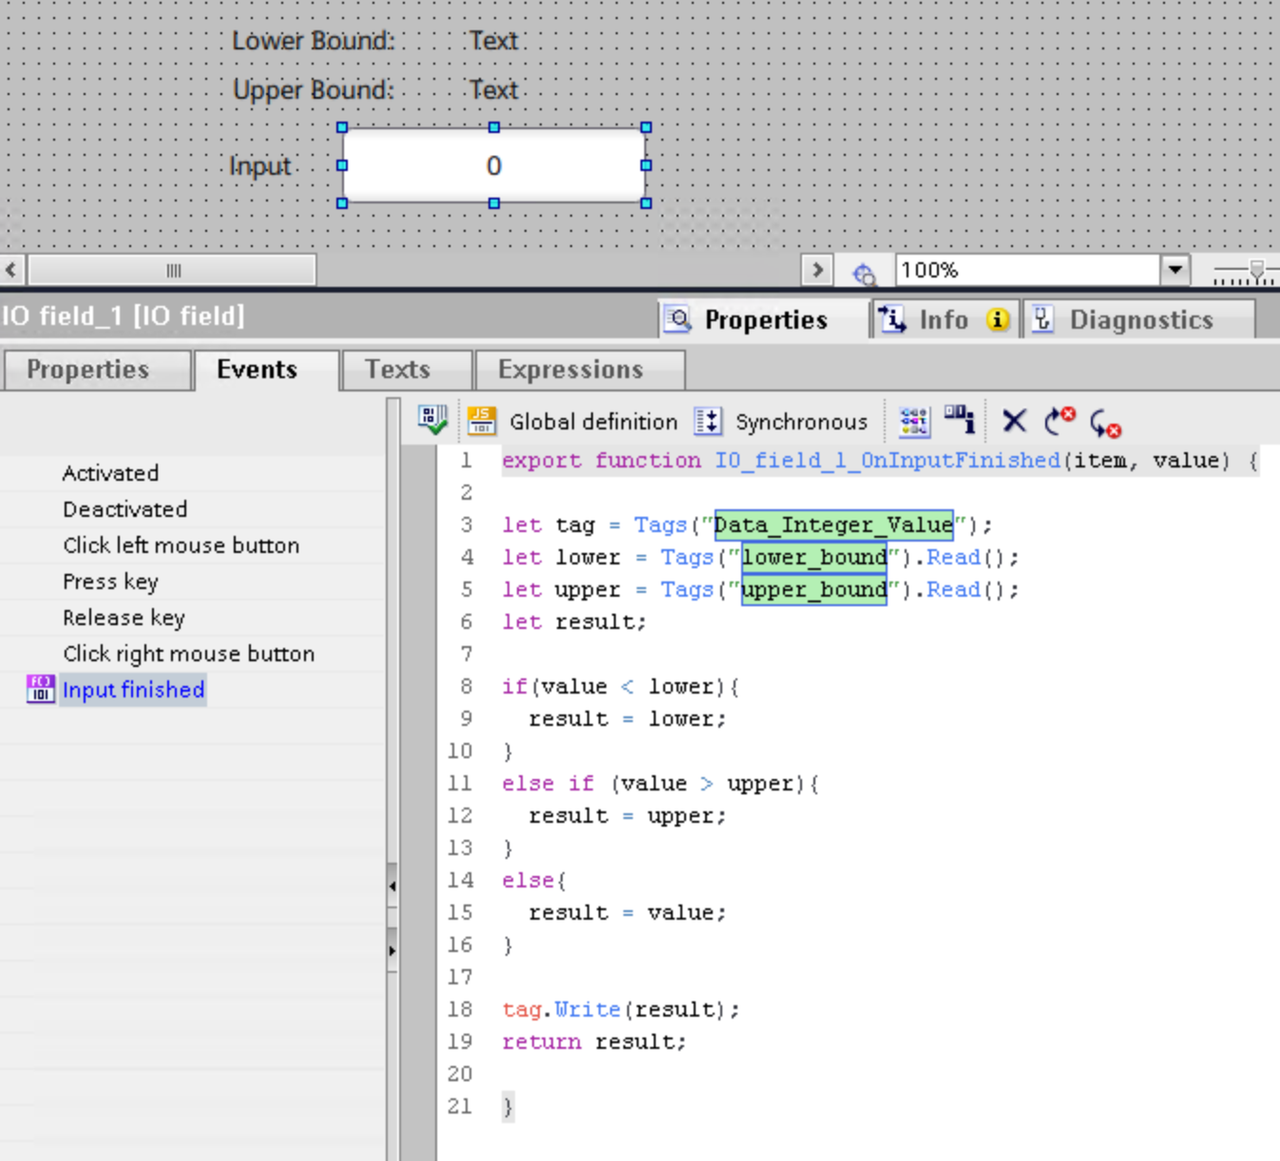
Define Upper and Lower Clamping Function
- Add a
Input finishedevent with the code below.
- Add a
export function IO_field_1_OnInputFinished(item, value) {

let tag = Tags("Data_Integer_Value");
let lower = Tags("lower_bound").Read();
let upper = Tags("upper_bound").Read();
let result;

if(value < lower){
  result = lower;
}
else if (value > upper){
  result = upper;
}
else{
  result = value;
}

tag.Write(result);
return result;

}